Irish wolfhound puppy sleeping 😴
Graphedia helping your company make sales while you sleep, having a little fun with one of the new members of the family here
Enjoy
https://youtu.be/HMST5mCig-k

Irish wolfhound puppy sleeping 😴
Graphedia helping your company make sales while you sleep, having a little fun with one of the new members of the family here
Enjoy
https://youtu.be/HMST5mCig-k

Log into the backend of your WordPress website as you normally would.
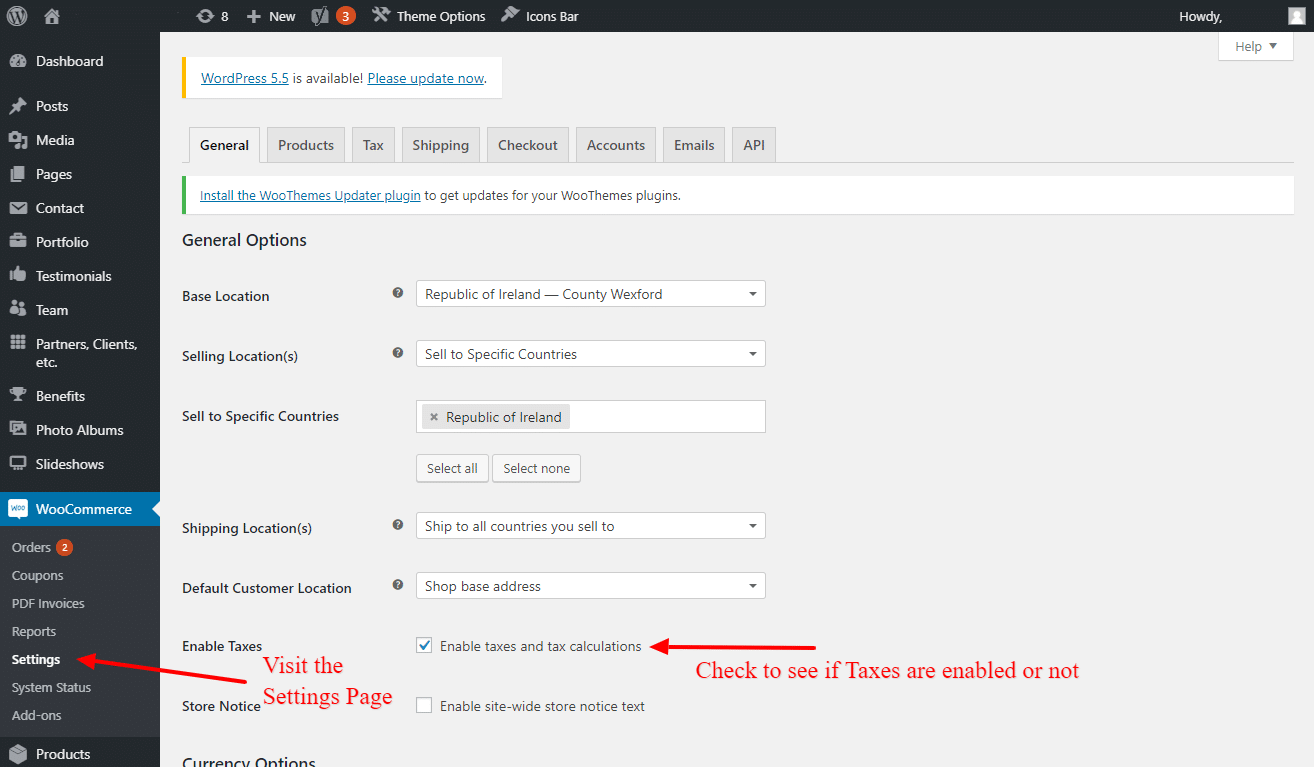
On the left-hand menu go to your WooCommerce settings page
WooCommerce > Settings
On the General Settings tab, check to see if Taxes are enabled. If taxes are not enabled (if the checkbox is not ticked) you have nothing to worry about and you can ignore the rest of the tutorial.

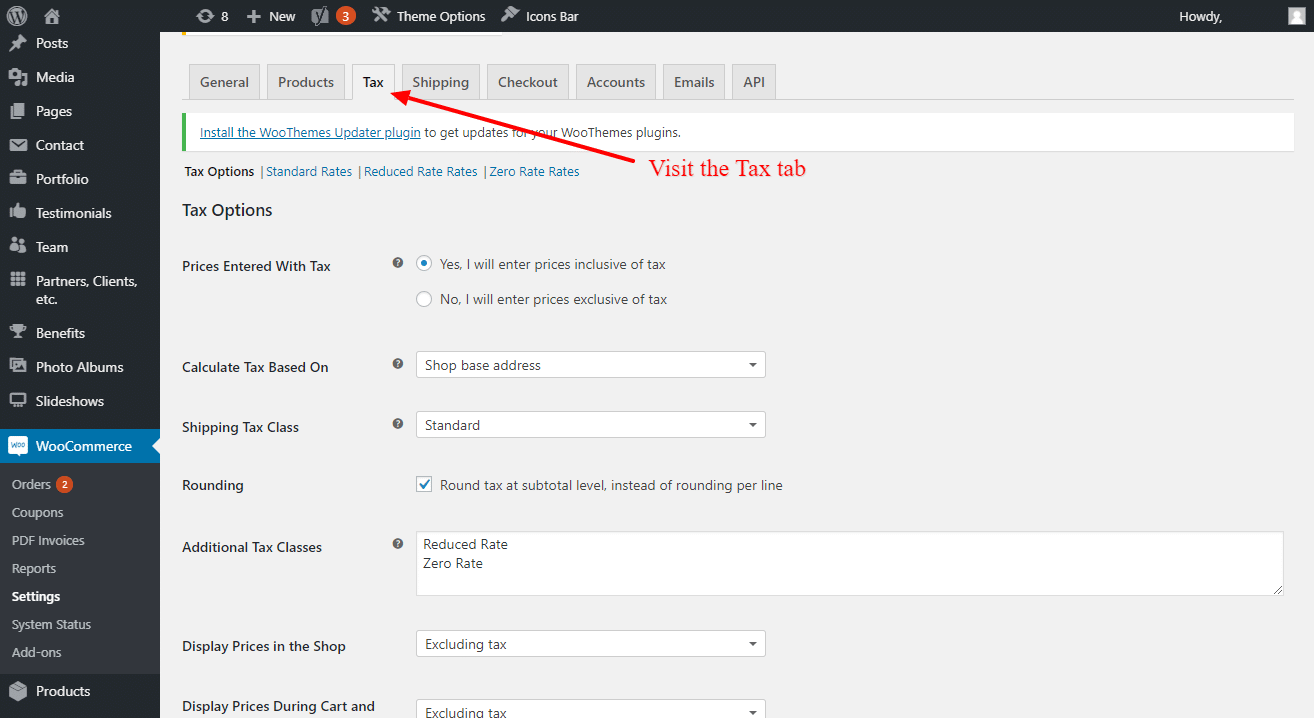
If Taxes are enabled, you should be able to see and Tax tab within the settings, click this to view the tax settings and continue with the tutorial.

Note: If your products are priced excluding VAT, changing to the new VAT Rate will change the final price of the product. If your products are priced inclusive of VAT, changing the VAT rate will have no bearing on the final product price on the website.
There are two ways which taxes might be enabled on the site, below is the explanation of how to change the rates depending on the way taxes were implemented
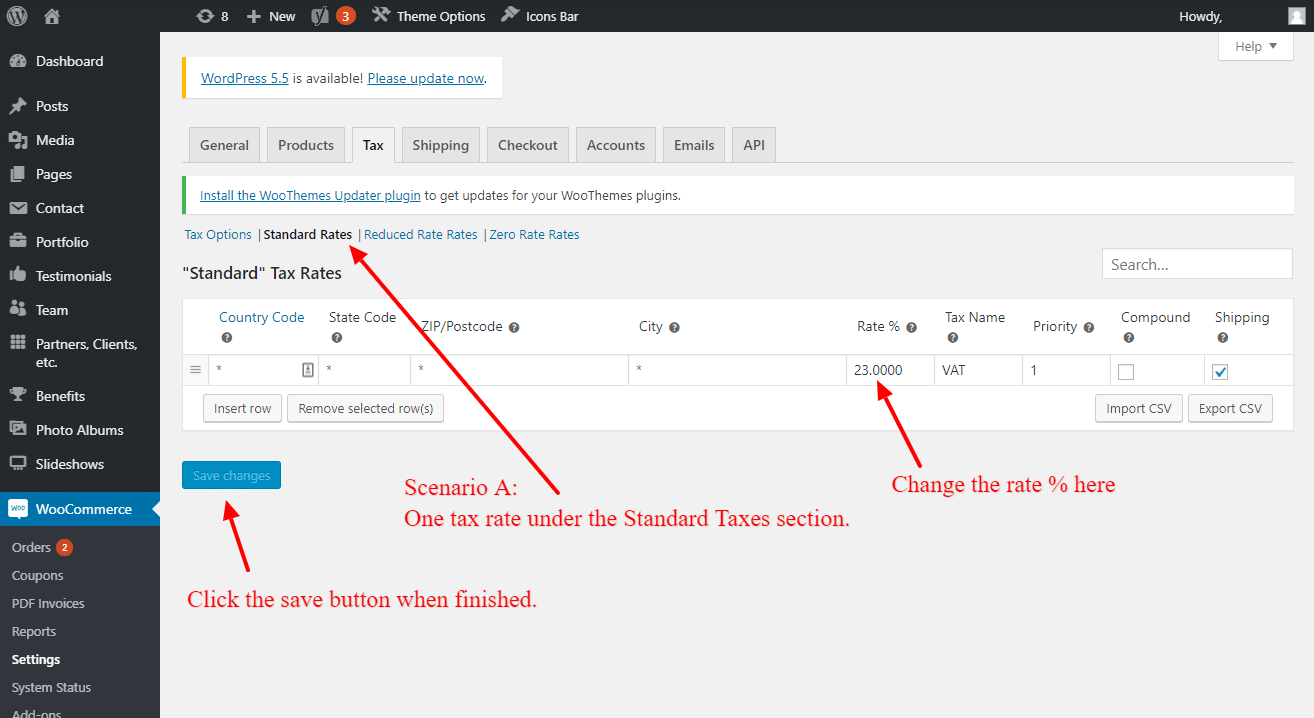
Scenario A:
If your website has one tax rate, this can be found (and changed) by clicking on the Standard Rates tab.
The Rate % can be changed here to 23% and then the change saved.
Once this is done, the new tax rate will be visible throughout the various pages on the website.

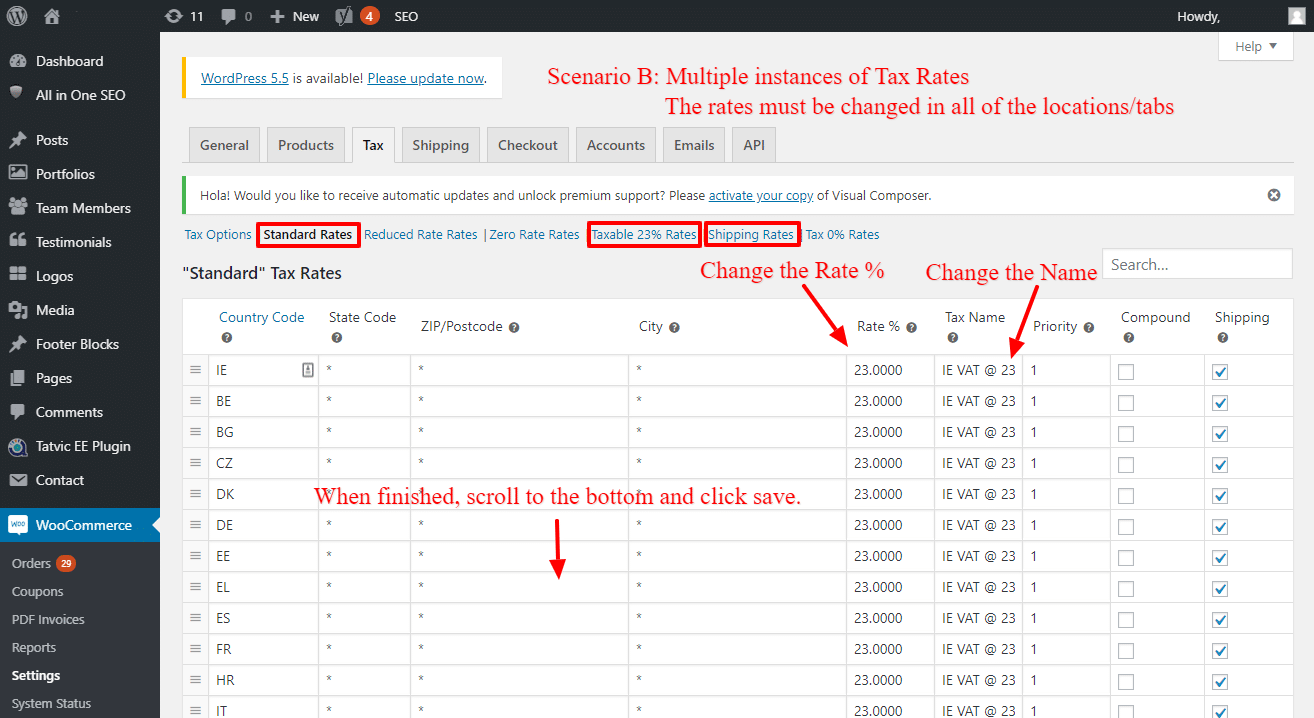
Scenario B:
If your website has more than one tax rate, for instance if you sell to multiple countries and wanted the option to change the tax rates for each, the process is similar to the above but you will have to change the rate in multiple areas.
Click the Standard Rates tab and change the Rate % along with the Tax Name for each row in the table that this applies to.
In this instance, we have another Tax rate section and a Shipping Taxes section, we need to change the Rate % here also and the tax Name as required. We can implement the same process as before and then save the changes.
Once changed, the rates will be saved to the site and this will be reflected on the site.


On September 1st the VAT rate in Ireland will temporarily change. Below is a guide describing how to change the VAT Rate on your eCommerce (WooCommerce) Website.
Log into the backend of your WordPress website as you normally would.
On the left-hand menu go to your WooCommerce settings page
WooCommerce > Settings
On the General Settings tab, check to see if Taxes are enabled. If taxes are not enabled (if the checkbox is not ticked) you have nothing to worry about and you can ignore the rest of the tutorial.

If Taxes are enabled, you should be able to see and Tax tab within the settings, click this to view the tax settings and continue with the tutorial.

Note: If your products are priced excluding VAT, changing to the new VAT Rate will change the final price of the product. If your products are priced inclusive of VAT, changing the VAT rate will have no bearing on the final product price on the website.
There are two ways which taxes might be enabled on the site, below is the explanation of how to change the rates depending on the way taxes were implemented
Scenario A:
If your website has one tax rate, this can be found (and changed) by clicking on the Standard Rates tab.
The Rate % can be changed here to 21% and then the change saved.
Once this is done, the new tax rate will be visible throughout the various pages on the website.

Scenario B:
If your website has more than one tax rate, for instance if you sell to multiple countries and wanted the option to change the tax rates for each, the process is similar to the above but you will have to change the rate in multiple areas.
Click the Standard Rates tab and change the Rate % along with the Tax Name for each row in the table that this applies to.
In this instance, we have another Tax rate section and a Shipping Taxes section, we need to change the Rate % here also and the tax Name as required. We can implement the same process as before and then save the changes.
Once changed, the rates will be saved to the site and this will be reflected on the site.
